Installation
This product is delivered as a zip file containing the blend file and an associated asset catalog file. An asset file is nothing more than a blend file containing node groups (in this case) marked as assets. When properly installed, the assets can accessed in the geometry node editor from the Add dropdown menu or by dragging from the asset browser.
Two methods of installation are described here, both require that your File Paths are set up properly.
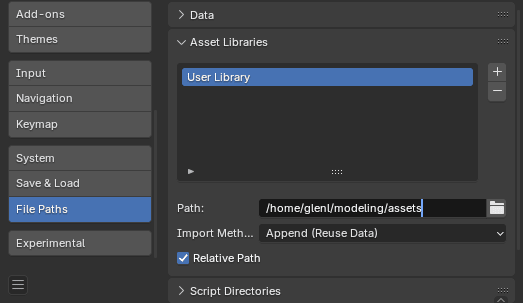
The Asset Library section in the preferences dialog
If you’ve not installed any assets the Path: may be defined but not created. Make sure that folder exists. You may want to do what I did and point to a folder of your choosing. The Import Method defaults to Append and should be left that way.
Method #1
Unzip the distributed file into a temporary folder
Open the asset’s blend file with Blender
The Asset Browser will be open in the top-left of the workspace. The Asset Library entry should be set to Current File.
Click on Copy Bundle to Asset Library, then select User Library.
Close blender
This will copy the necessary files and add a Gearbox entry to your asset library. The temporary folder is no longer needed and you can copy the Gearbox zip file to a location for possible future re-installations.
Method #2
If you prefer to organize your own assets you probably already know what to do. Here is a short summary of the process.
Copy the unzipped blend file into the folder you have named as your User Library.
Open the blend file for the asset.
The Asset Browser will be open in the top-left of the workspace. The Asset Library entry should be set to Current File.
Add a new category and name it Gearbox
Select the Unassigned category.
Select all the gearbox assets, drag and drop them into Gearbox.
Save your new category
Some links to the Blender documentation,